MORGAN // Resident Plotter at Maus Hábitos
Updated user guide for using the Morgan plotter. Work in progress.
1. Convert SVG to Gcode using svg2gcode
2. Connect to the PLOTTER wifi. password: plotter00. Draw Gcode using CNCjs
1. Creating Gcode File
Prepare vector drawing as SVG file.
Convert SVG to Gcode using svg2gcode. These are the default settings for Morgan:
tolerance 0.2 feedrate 6000.0 dpi 96.0 tool_on_sequence M3 S700
G4 P0.300tool_off_sequence M3 S200
G4 P0.300begin_sequence M3 S200
G4 P0.300end_sequence M3 S200
G4 P0.300
G00 X0 Y0
Tips:
- Adjust the drawing speed by changing the feedrate.
- Decrease the tolerance if you need smoother curves.
- Change the pen up and down positions by changing the
Sparameter of the tool control sequences (0 = 100% up, 1000 = 100% down). - Change the time the machine waits during pen motions by changing the
Pparameter (in seconds). - Ajust the dpi to fix the drawing scale if it is wrong, see: The drawing scale is wrong.
2. Drawing
Open CNCjs to draw the Gcode
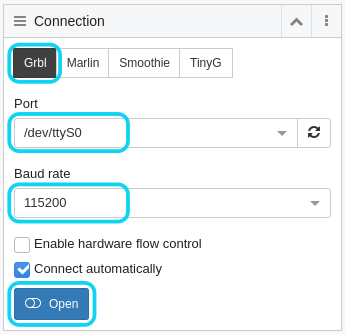
Open the Serial Connection
- If the machine is not already connected, click
Openin the connection widget. - The firmware selected should be
Grbl. - The port should be
/dev/ttyS0and the baud rate115200.
- If the machine is not already connected, click
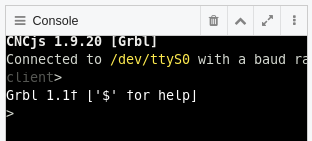
Home the machine
- If the machine has just been switched on or reset, click
Reset. You should seeGrbl 1.1f ['$' for help]appear in the console widget.
- Click
Homing, and the toolhead will first move in the X and then Y axes, until it hits the endstop switches. Once the homing cycle has completed you should be able to use the jog controls.
- If the machine has just been switched on or reset, click
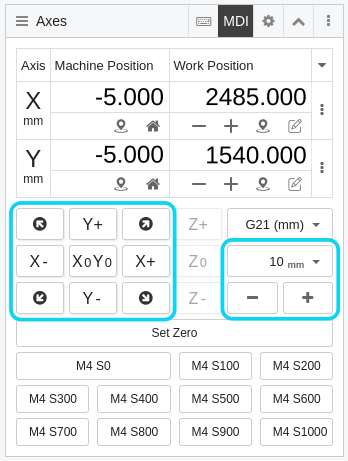
Set the Work Zero
- Using the jog controls, move the toolhead to where you would like to put the origin of your drawing. You can change the jog step size using the +/- buttons or the drop down menu. If you are using the whole area of the machine for your drawing, leave the toolhead in the home position.
- Once the toolhead is in the right position, click
Set Zero. The work position should now read (0,0).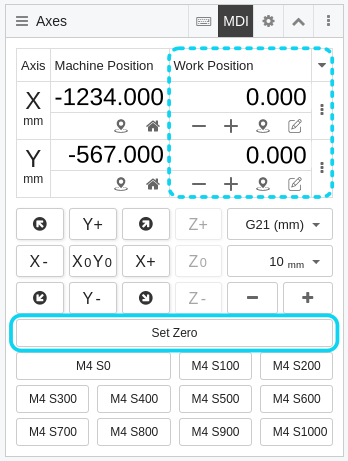
- Using the jog controls, move the toolhead to where you would like to put the origin of your drawing. You can change the jog step size using the +/- buttons or the drop down menu. If you are using the whole area of the machine for your drawing, leave the toolhead in the home position.
Set up the Pen
- After you have set the work zero you can continue using the jog controls to move the toolhead to a comfortable position to access and adjust the pen.
- Move the toolhead to the pen-down position (700 by default) by sending the
M4 S700command.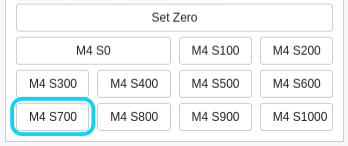
- Put an empty pen holder into the toolhead, and secure it with the large screw (1). If the pen is very large, you can put it directly into the toolhead without the extra pen-holder.
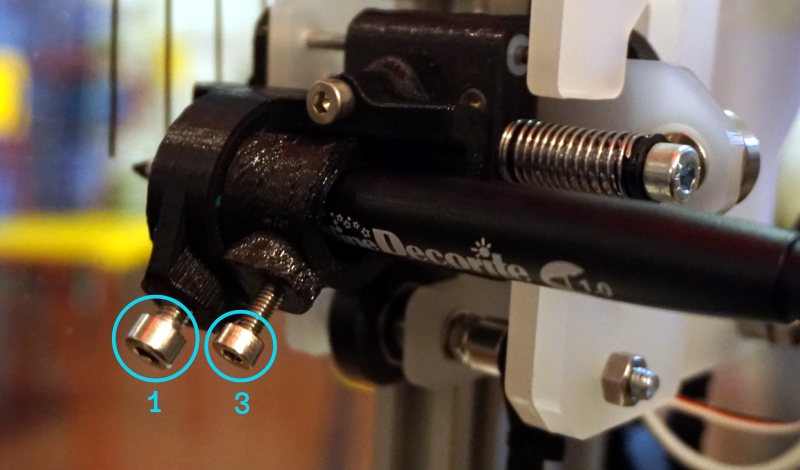
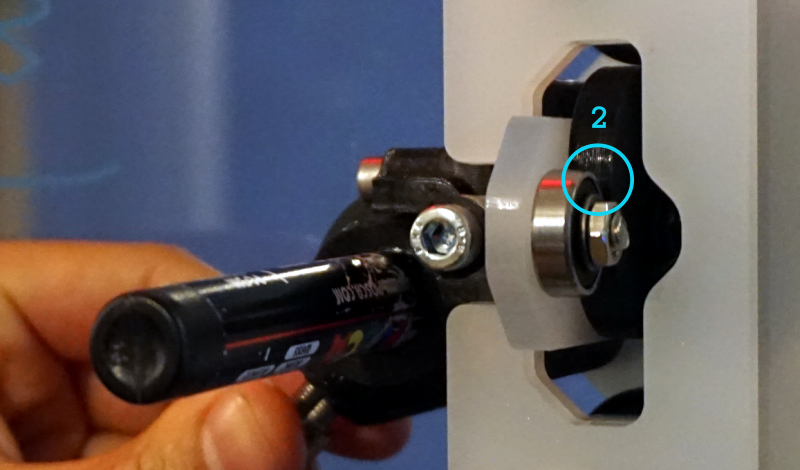
- While holding the pen so that it is touching the drawing surface, and pull back the toolhead so that there is a small gap (3-4mm) between the bearing and the cam (2). Then tighten the small screw (3).
- Move the toolhead to the pen-up position (300 by default) by sending the
M4 S300command, and check that there is enough clearance between the pen tip and the drawing surface.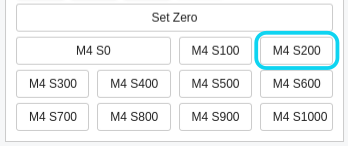
Upload Your G-code
- By clicking
Upload G-codein the preview window and selecting your file.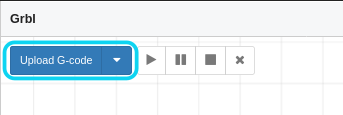
- The preview will show the complete toolpath, including when the pen is not drawing.
- You can navigate the preview by clicking and dragging to pan, and scroll to zoom.
- You can unload the G-code by clicking the
X.
- By clicking
Start Drawing
- If the preview looks correct click
play. You can pause the drawing at any time by clickingpauseor cancel it by clickingstop.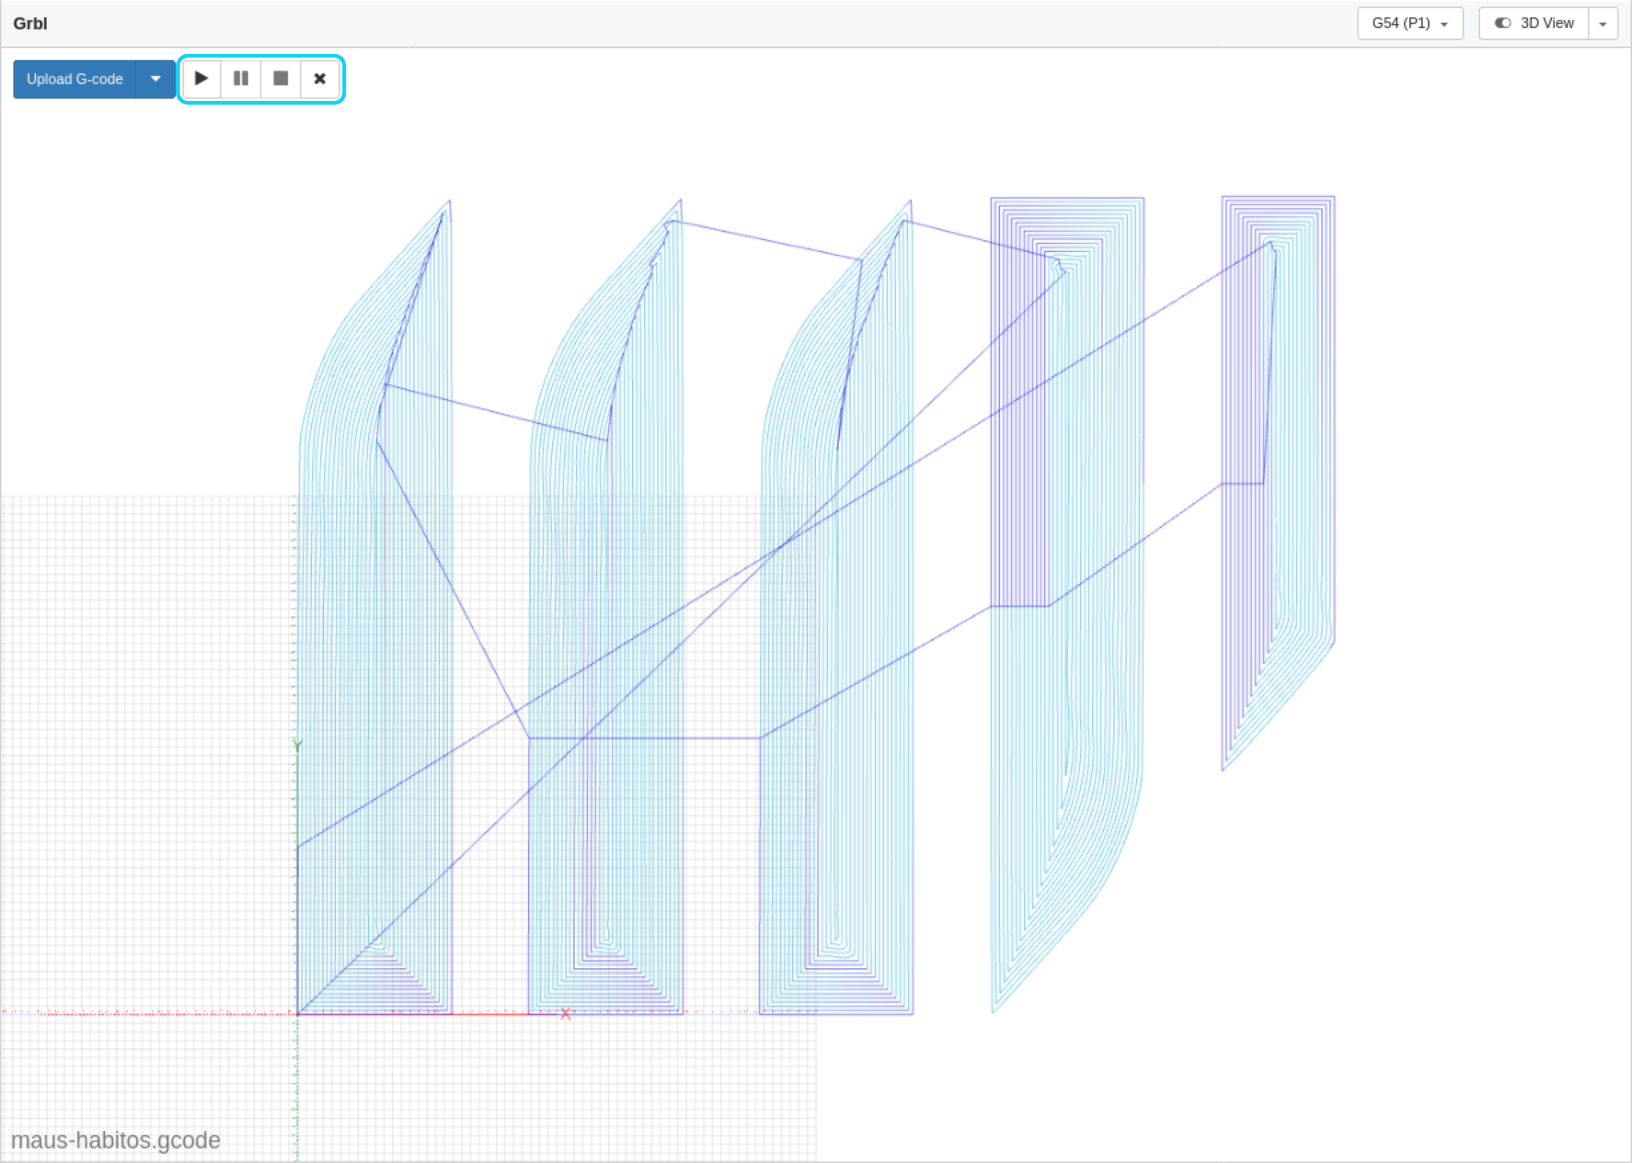
- If the preview looks correct click
The G-code widget will also show the progress of the drawing.
You do not need to keep your browser while the machine is working, you can reopen CNCjs at any time to monitor its progress.
HELP
The drawing scale is wrong
Try changing the dpi setting in svg2gcode. Usually this should be 96, but this depends on the SVG document properties. You can calculate the dpi you want by using the formula target_dpi = current_dpi * ( target_drawing_size / current_drawing_size )
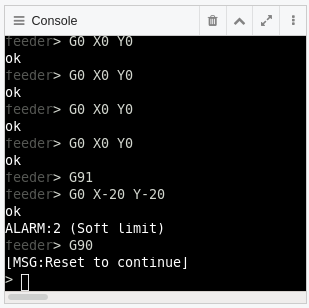
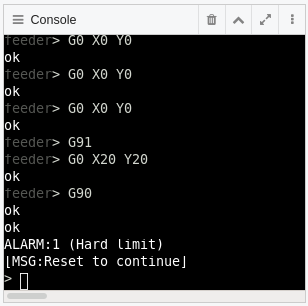
The machine won't move, and/or the jog controls are greyed out.
If the toolhead tries to move outside of the limits of the drawing area, the machine will enter an alarm state. This can be detected via the coordinate position (soft limits), or one of the limit switches (hard limits).
This can happen when:
- The drawing is too large for the machine, or by not allowing enough space for the drawing relative to the work zero position.
- Trying to move the toolhead outside of the drawing area with the jog commands.
- Something obstructs the toolhead and shifts its position while it is working, so that the machine loses its zero reference.
Whenever this happens, you need to reset the machine and redo the homing cycle. You may lose the work zero and have to define it again.
The machine made some loud noises.
The machine can try to move outside of the drawing limits if it has lost its zero reference, or there could be something else obstructing its motion. In either case the belts will start slipping on the motor pulleys which will make some noise.
If nobody got hurt in the process, this is fine :). Just restart the machine and follow the normal reset and homing cycle.
The pen only drew on part of the drawing surface
The drawing surface is never completely flat and level relative to the machine gantry, so you need to allow for some variability in the drawing position of the pen. This is why you need to allow for a small gap between the bearing and servo cam when adjusting the pen position. (see step 4.) Try adjusting the pen position so that this gap is slightly larger.
The pen is drawing lines as it moves between parts of the drawing
The pen is not lifting high enough to have sufficient clearance when travelling between lines. Try adjusting the pen slightly higher in the tool holder.
There are lines missing in the drawing
If there are lines missing from the drawing, or other strange artefacts, try making sure all paths are ungrouped and export your G-code again. After ungrouping everything, select all your lines and also make sure they are all converted to paths (In Inkscape: Path > Object to Path).
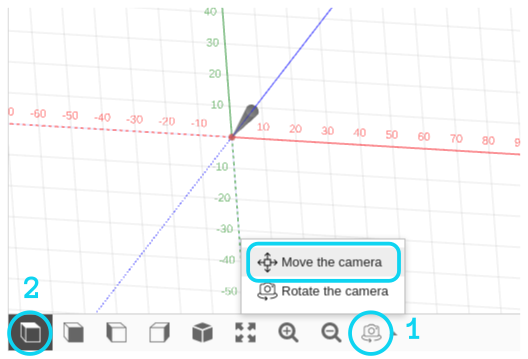
The preview in CNCjs is in 3D and I cannot pan.
Make sure the mouse control is set to Move the Camera in order to pan the view (1). You can return to a 2D view by selecting the top view shortcut (2) (you may need to select another view first).
GLOSSARY
G-code
This is the file that contains your drawing in a format the machine can understand and reproduce. This G-code data is also known as the toolpath.
Toolhead
This is the part of the machine that holds and moves the pen.
Home (Machine Zero)
When the machine is switched on, it does not know where the toolhead is. This is why we first have to move the toolhead to the home position so that the machine has a zero point reference. This is called 'Home' or 'Machine Zero'.
Work Zero
This is where we want to put the origin of our drawing, which is defined in Inkscape by the left-most orientation point. Generally this should be at (0,0) in Inkscape.
Jog Controls
These are arrow keys/commands let you move the toolhead in real-time.
Raspberry Pi
This is a small computer attached to the plotter running Linux.
https://www.raspberrypi.org/
Arduino
This is a microcontroller that controls the motion of the machine, and talks to the raspberry pi via a UART serial connection.
https://www.arduino.cc/
GRBL
This is open-source firmware for CNC machines, which is running on the Arduino.
https://github.com/gnea/grbl/wiki